Photo portraits
How to Make a Perler Bead Portrait From a Photo
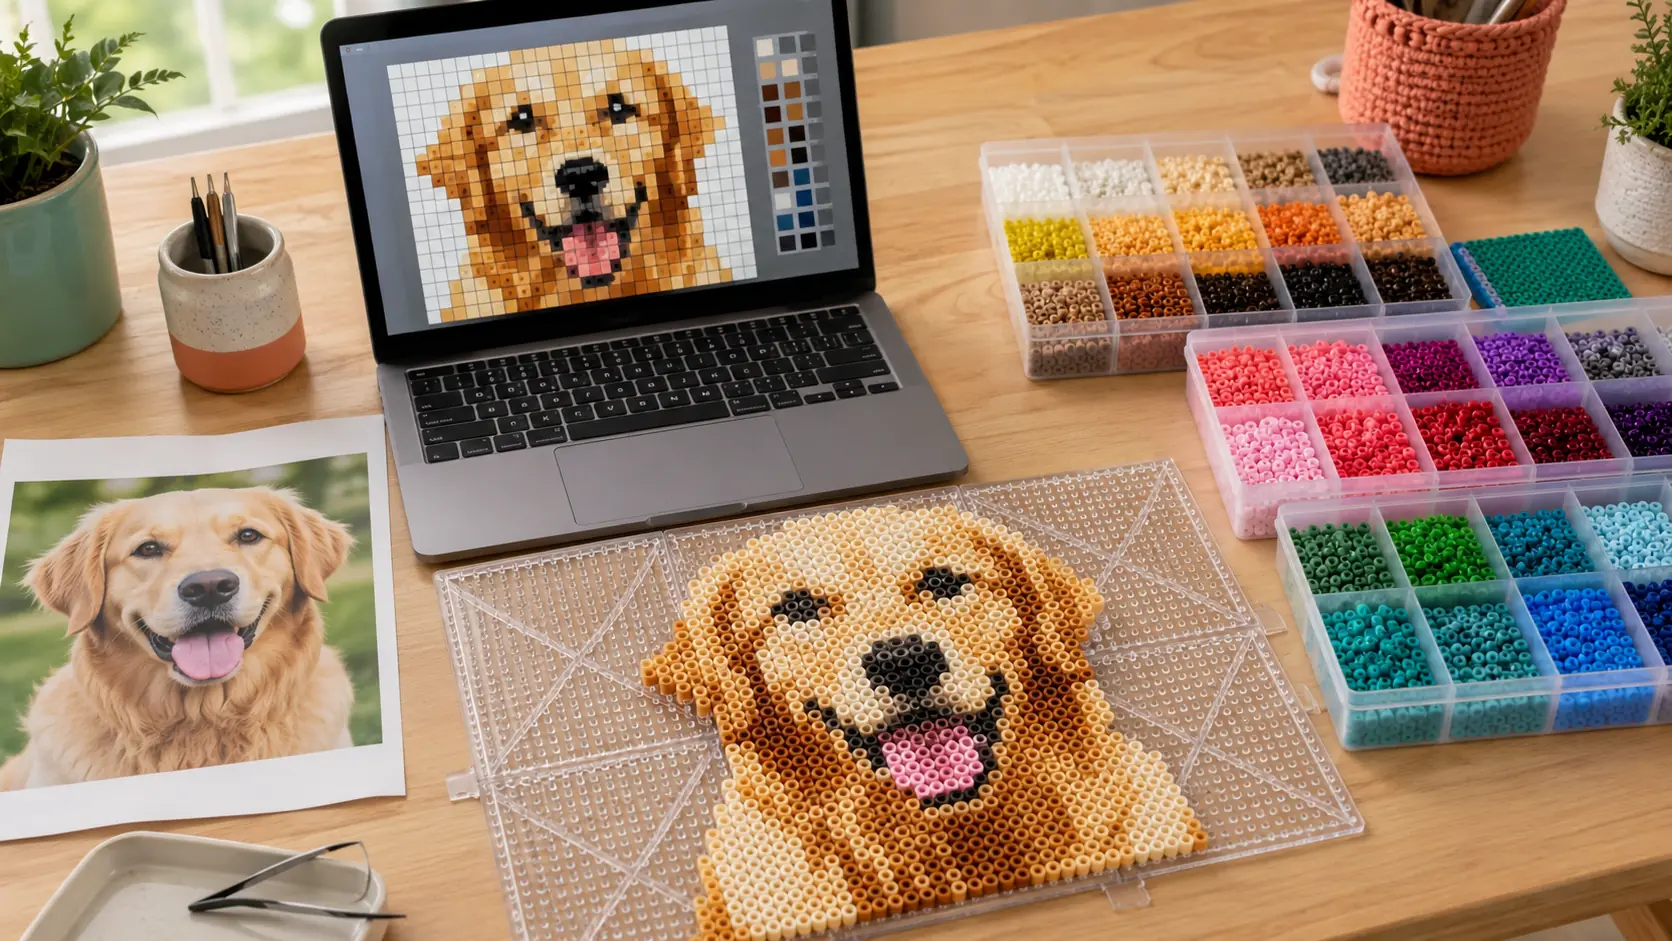
To make a Perler bead portrait from a photo, crop tightly around one face, choose a grid large enough to preserve the eyes and silhouette, reduce the image to a deliberate bead palette, then clean the pattern before you print or build it. The converter creates the first draft; your crop, size, palette, and final edits are what make the finished portrait recognizable.
This guide covers people, dogs, cats, and memorial portraits. You will learn which photos work, how many pegboards and colors to use, when dithering helps, what to fix by hand, and how to turn the approved preview into a board-by-board physical build.
The fastest reliable workflow
Open the free BeadForge photo-to-bead pattern maker, choose the Portraitpreset, crop the face, test 2×2 and 3×3 board layouts, restrict the palette to colors you can build, then send the result to Studio for eye, edge, and background cleanup. Export only after the portrait still looks like the subject at normal viewing size.
Why Portraits Are Harder Than Logos and Sprites
A logo can survive as a few flat shapes. A portrait depends on tiny relationships: the distance between the eyes, the angle of a mouth, the highlight on a nose, the edge of a cheek, or the color break between a pet’s face and ear. A phone photo may contain millions of pixels, while one common 29×29 pegboard offers only 841 possible bead positions. Most of the original information must disappear.
The goal is not to preserve every eyelash or strand of fur. The goal is to preserve the identity cuesthat still work after the photo becomes a limited grid of physical colors. A cleaner 12-color portrait can look more like the subject than a 30-color conversion full of scattered specks.
- People: prioritize eye spacing, face shape, hairline, eyebrows, glasses, and the mouth shadow.
- Dogs: prioritize ear silhouette, eye placement, muzzle width, nose shape, and major coat markings.
- Cats: prioritize ear tips, eye angle, nose triangle, muzzle contrast, and whisker-pad shape.
- Memorial portraits: preserve the expression and familiar markings before decorative backgrounds.
Step 1: Choose a Photo That Will Survive the Bead Grid
Start with the original camera file when possible. Social-media downloads and screenshots may already have compression, sharpening, filters, or lost shadow detail. Resolution matters less than subject clarity: a close, bright phone photo usually converts better than a distant professional group photo.
| Photo trait | Why it helps | Quick repair when it is weak |
|---|---|---|
| One large face | More grid cells describe the features that establish identity | Crop out extra people, furniture, sky, or floor |
| Visible eyes | Eyes anchor the expression and help the portrait read immediately | Choose another frame instead of inventing a hidden eye |
| Soft directional light | Keeps shape without crushing one side into black | Lift shadows slightly; avoid flattening all contrast |
| Clear subject edge | Separates hair, ears, and shoulders from the background | Remove or simplify the background before adding boards |
| Natural color | Maps more predictably to a physical bead palette | Reduce heavy filters and extreme saturation |
| Minimal motion blur | Preserves eye, mouth, and fur boundaries | Use a sharper photo; software cannot recover missing edges reliably |
If you have five possible photos, make five small previews before perfecting one. The best reference is the image that produces a recognizable grid—not necessarily the image that looks most dramatic on a phone. See the best-image guide for a deeper photo checklist.
Crop for recognition, not for composition
Traditional portrait photography often leaves attractive space around the subject. A bead portrait needs those cells for the face. Crop until the head and important shoulders, ears, hair, or accessories occupy most of the frame. Keep a little breathing room around the silhouette, but do not spend half the grid on a wall that can be left empty.
The cheapest detail upgrade is a tighter crop
Moving from 58×58 to 87×87 raises the maximum positions from 3,364 to 7,569. Before buying more boards and beads, remove unused scenery. A tighter crop often gives the eyes and mouth more usable cells without increasing the physical project.
Step 2: Pick the Smallest Grid That Preserves the Identity
Grid size controls detail, material cost, build time, workspace, and fusing difficulty. Compare several sizes at the same crop. Look at the preview from across the room or shrink it until it approximates the finished viewing distance. If you recognize the species but not the individual, the pattern needs a better crop, more cells, stronger feature edits, or all three.
| Board layout | Bead grid | Maximum positions | Portrait use |
|---|---|---|---|
| 1×1 common square board | 29×29 | 841 | Stylized avatar, bold silhouette, or extremely simple pet face |
| 2×2 boards | 58×58 | 3,364 | Practical first test for one tightly cropped face or pet |
| 3×3 boards | 87×87 | 7,569 | Detailed eyes, fur, glasses, hair, and more natural shading |
| 4×4 boards | 116×116 | 13,456 | Large commissions, multiple facial details, or a meaningful background |
These totals assume every peg is occupied. Background removal can leave thousands of cells empty, so use BeadForge’s generated material count as the shopping number. The pegboard size guide covers rectangular layouts and project planning in more detail.
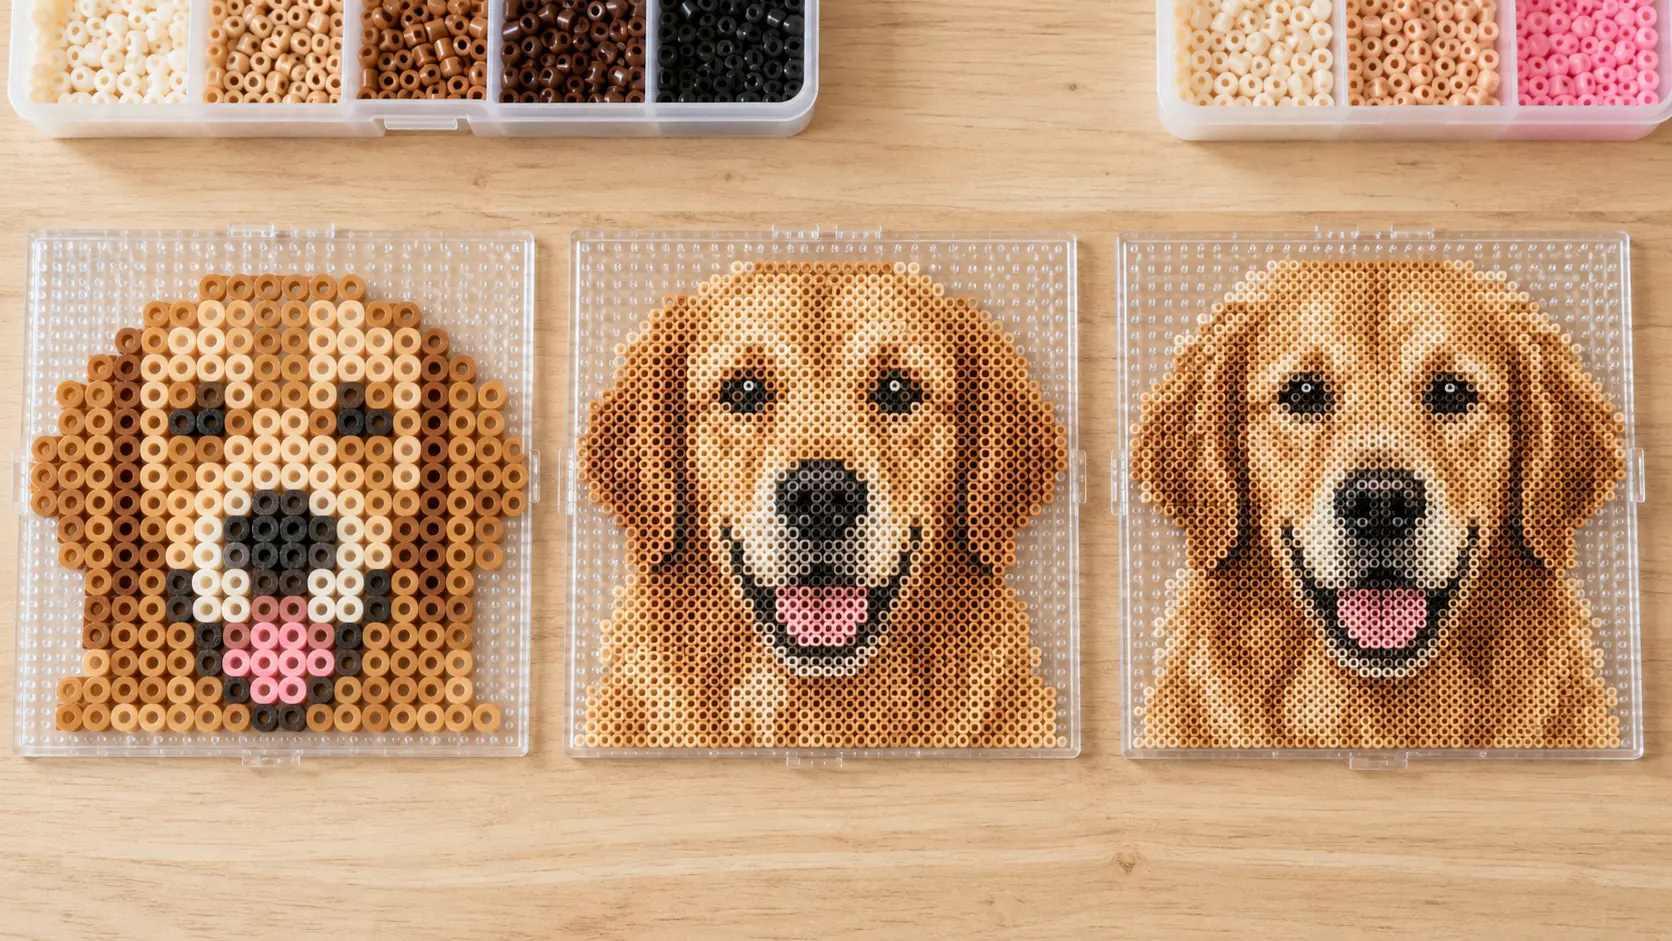
Use a rectangular layout when the photo calls for it
A head-and-shoulders person may fit a 2×3 portrait layout better than a 3×3 square. A long dog lying down may work better at 3×2. Match the board aspect ratio to the crop so you are not paying for empty rows. The physical width and height should be decided before you perfect colors because changing the grid later can move every feature.
Step 3: Start With a Deliberate Real-Bead Palette
Screen colors are effectively unlimited; bead colors are not. Choose the manufacturer and bead size you intend to build with, then keep the palettes separate unless you have tested the physical combination. BeadForge’s perceptual matching chooses from real catalog references, but the final pattern should also be restricted to the colors you own or can reliably replace.
For a single portrait, begin around 10 to 18 colors. That is a working range, not a rule. A black dog with controlled lighting may need fewer; a face with colorful hair, patterned clothing, and glasses may need more. Every color should have a job such as highlight, midtone, core shadow, outline, eye, or accent.
- Merge shades that appear in only a handful of unimportant background cells.
- Keep enough separation between skin or fur and the background.
- Protect the darkest eye, nostril, mouth, and outline colors from being remapped into one muddy mass.
- Check pale highlights on a light background; screen contrast may be stronger than physical contrast.
- Add a small waste allowance after the exact count, especially for a commissioned piece.
When dithering helps—and when it becomes noise
Dithering alternates available colors to simulate an in-between shade. It can make skin, fur, and soft shadows blend from a few feet away. At bead distance it looks intentionally speckled. Test the balanced and dithered versions, then judge the whole portrait—not a zoomed-in patch.
- Keep it when cheeks, fur, clothing, or a gradient become smoother without damaging features.
- Reduce it when isolated light and dark beads collect around the eyes, teeth, glasses, or edge.
- Turn it off for a flat graphic portrait, strong cartoon style, logo-like avatar, or existing pixel art.
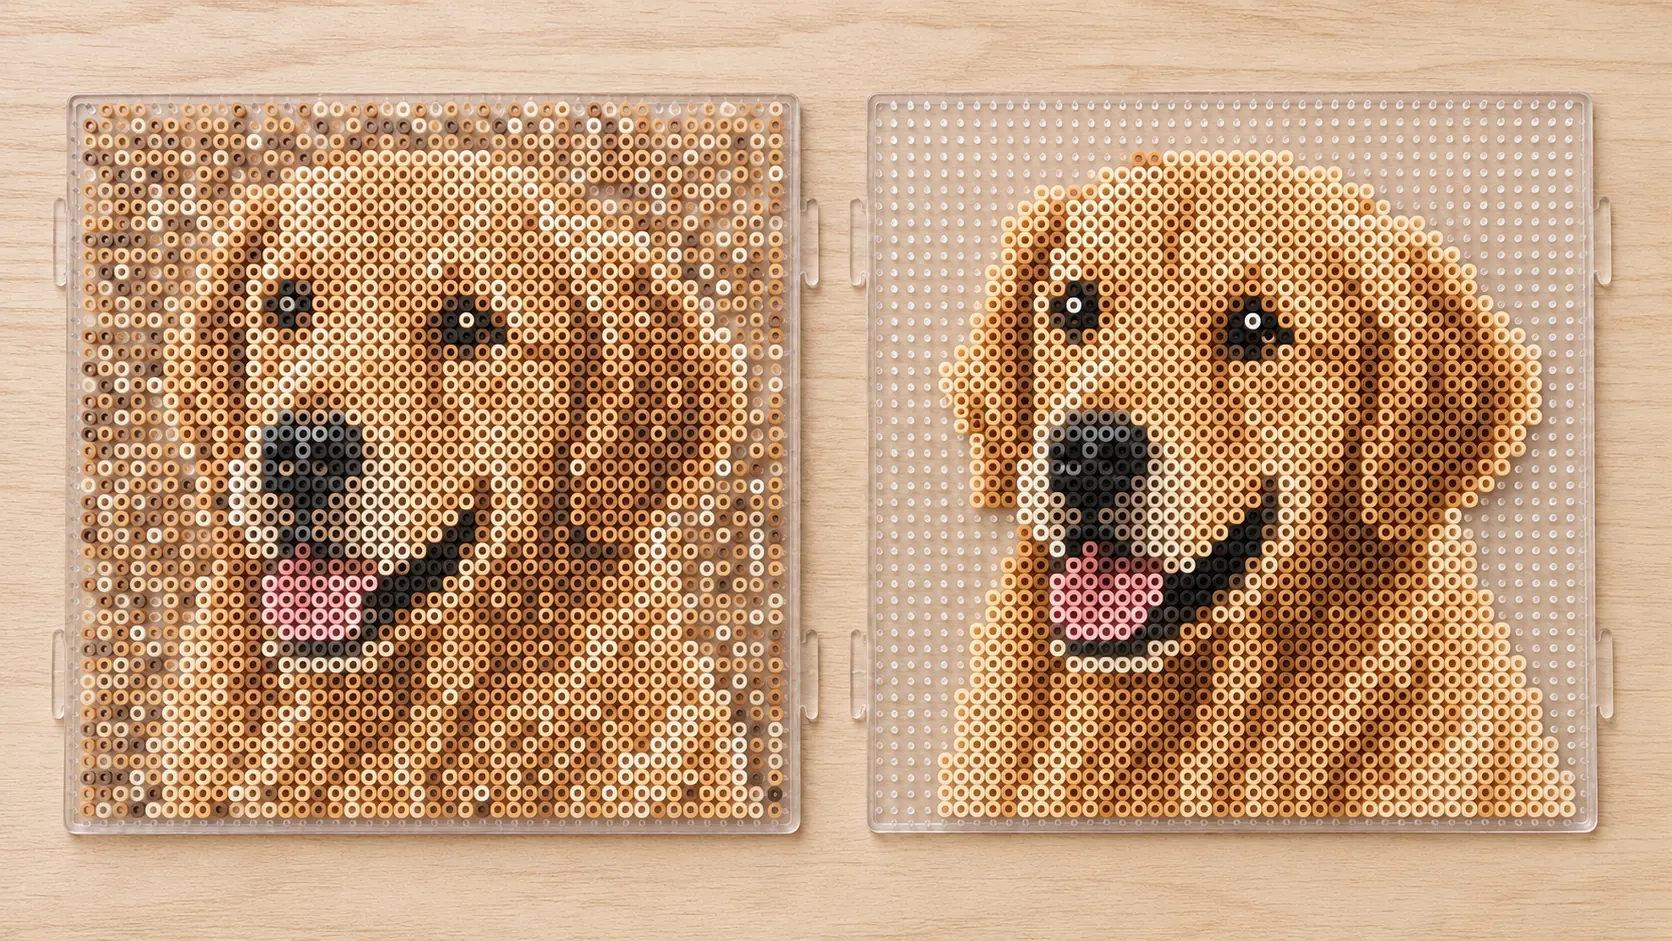
Step 4: Fix the Features That Carry Recognition
Automatic conversion is a strong first draft, not the final authority. Send the generated pattern into BeadForge Studio and inspect it at bead scale. Start with the eyes and move outward. A few precise changes can improve identity more than globally increasing resolution or palette size.
Eyes
Check spacing, height, pupil direction, and one restrained highlight. If one eye is darker because of the original light, preserve the shape before forcing perfect symmetry. Remove stray beads that make the eye look larger, cross-eyed, or disconnected from the brow or fur around it.
Nose, mouth, and muzzle
Avoid turning every shadow into the same solid black region. Keep a boundary between nose and mouth where the reference has one. For pets, the muzzle width and nose placement often identify the animal faster than small fur details. For people, the mouth may need only a dark line, a lip midtone, and one highlight.
Silhouette, hair, and ears
Zoom out and inspect the outside edge. Restore an ear tip, hair shape, shoulder line, or collar that the background removal cut away. Delete detached background beads and fragile one-bead islands unless they are essential. If the subject is recognizable as a solid silhouette, the interior color work has a stronger foundation.
Skin, fur, and difficult colors
A screen preview cannot guarantee a perfect physical color match. Light, monitor settings, dye lots, and specialty finishes all change appearance. Make a small swatch with the key highlight, midtone, shadow, and background colors before building a large or paid portrait. If two shades are nearly identical in real life, merge them or separate their roles more clearly.
Five-minute portrait quality test
- Hide the source photo and view only the bead preview.
- Shrink the preview or step six to ten feet away.
- Ask whether the eyes, silhouette, and one signature marking still read.
- Temporarily remove the background and compare again.
- Show the pattern to someone who knows the subject but has not watched you edit it.
Step 5: Print a Blueprint That Matches the Physical Boards
Do not build a large portrait from one tiny screenshot. Export an overall reference, exact color counts, a symbol-backed legend, and one labeled page for every physical pegboard. Keep the paper pages in the same orientation as the connected boards so you do not mirror a section or shift a row.
- Pull and label every required color before placement begins.
- Build one board or one color region at a time and mark progress in Craft Mode.
- Compare the touching edges of neighboring boards before moving to the next quadrant.
- Inspect both eyes and the face outline again when all boards are connected.
- Photograph the unfused layout so misplaced beads can be repaired from a reliable reference.
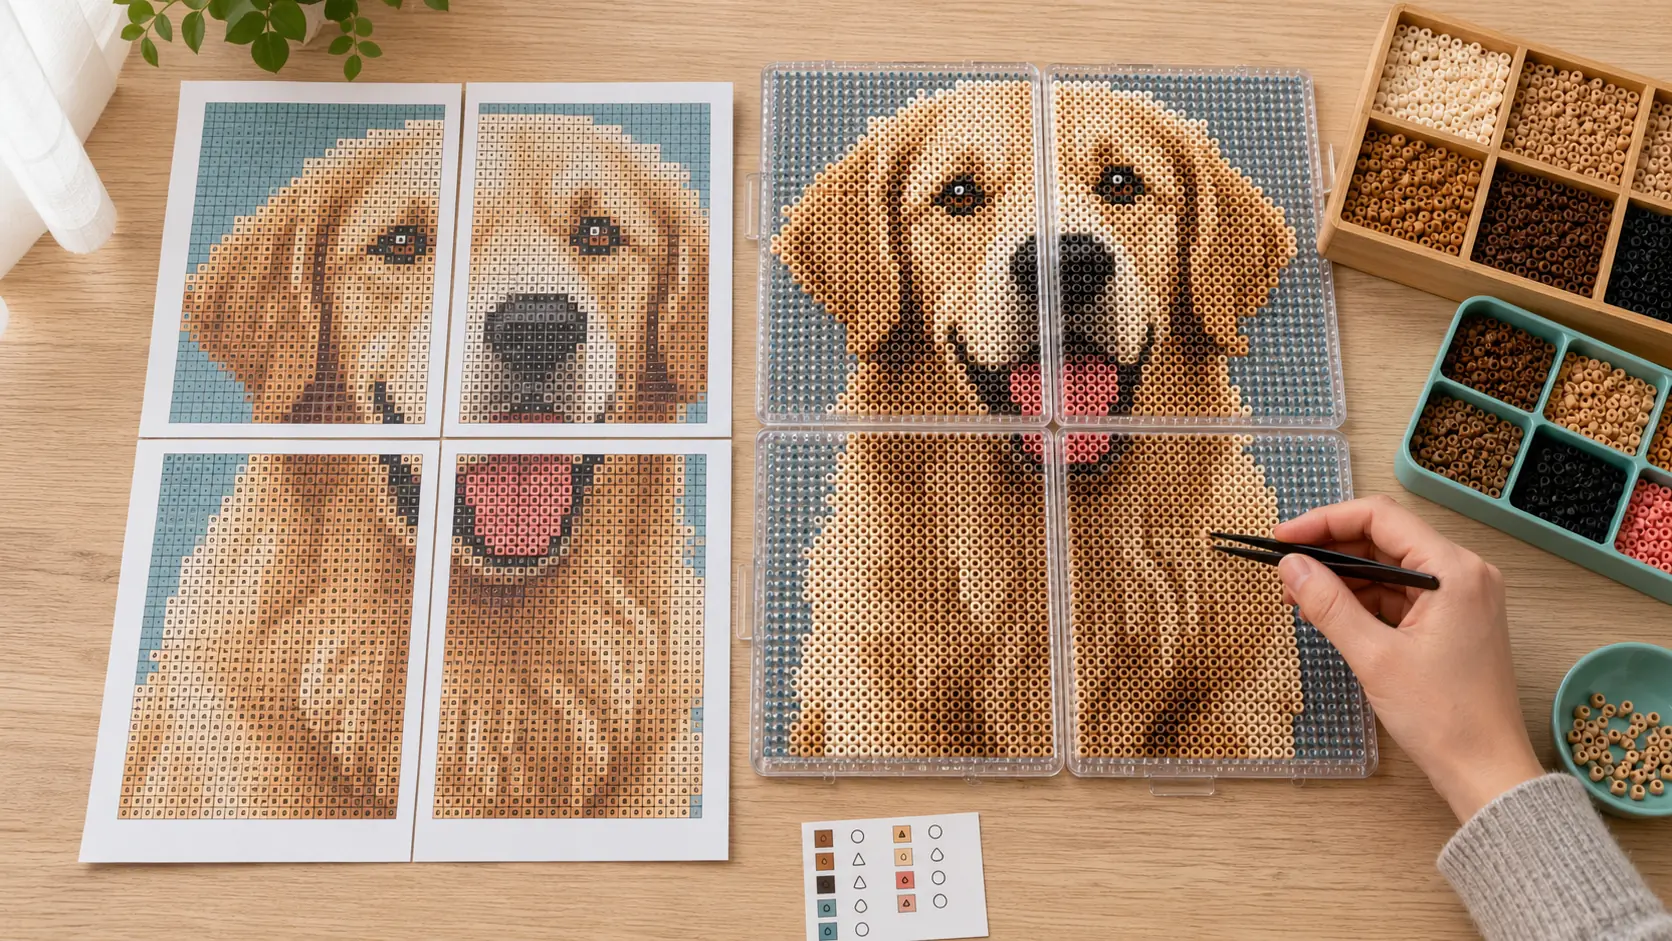
Upload a person or pet photo, compare board sizes, use a real bead-brand palette, clean the result in Studio, and export the board-by-board PDF. Processing stays on your device and requires no account.
Make your portrait pattern free →Step 6: Fuse a Large Portrait Without Losing the Work
Plan the fusing method before the last bead is placed. Large connected projects are harder to move, heat evenly, flip, and cool flat. Prepare the heat-safe work surface, clean ironing paper, rigid supports, and a broad cooling weight before the iron turns on.
- Use a dry iron and the setting tested for the exact bead brand and size.
- Keep the iron moving in overlapping passes and inspect rather than trusting one universal timer.
- Give board seams and outer edges consistent heat without holding the iron still.
- Let the first side stabilize before lifting or flipping the portrait.
- Cool the complete piece under even weight that supports every edge.
Perler publishes a tape method for large projects, which transfers a classic-bead design off the pegboards before fusing. Perler notes that this method is not suitable for Mini Beads. Follow the instructions for the exact material you use, and read our iron temperature guide and flat-fusing guide before heating a portrait that took hours to build.
Portrait Troubleshooting
| Problem | Likely cause | Best next move |
|---|---|---|
| It looks like a generic face or dog | Grid too small or defining features were averaged away | Crop tighter, increase the grid, then restore eye, ear, hair, or marking shapes |
| The face looks muddy | Too many similar colors or shadows collapsed into one mass | Reduce near-duplicate shades and preserve clear highlight, midtone, and shadow regions |
| The eyes look wrong | One- or two-bead shifts changed spacing, size, or gaze | Edit eyes manually at full bead scale and compare at normal viewing distance |
| The edge looks fuzzy | Busy background colors leaked into hair, ears, or shoulders | Remove the background, then redraw only the missing silhouette cells |
| The portrait is full of confetti | Dithering, noise, or unlimited palette matching created isolated beads | Lower dithering, limit colors, and run isolated-pixel cleanup before manual edits |
| The design is too expensive | Oversized square layout or background consumes unnecessary cells | Use a tighter or rectangular crop and remove nonessential background before reducing detail |
| The printout is hard to follow | One overview image lacks board labels and color distinction | Export board pages with symbols, exact counts, and a shared orientation map |
Human Portraits, Pet Portraits, and Memorial Pieces
People
Preserve the face shape and expression before patterned clothing or scenery. Glasses need consistent rims and bridges; teeth usually look better as a restrained light region than a row of hard white squares. For two people, expect to crop closer or add boards because each face receives fewer cells.
Dogs and cats
Pet portraits often benefit from a simple empty background because fur edges and ears already create a complex silhouette. Keep the eyes and nose crisp, then simplify fur into major light and dark regions. A collar color or chest marking can be a stronger identity cue than dozens of tiny fur shades.
Memorial gifts and commissions
Use only a photo the customer owns or has permission to provide. Confirm the crop, finished dimensions, background, palette style, and digital proof before pulling thousands of beads. Describe the result as a handmade pixel interpretation rather than an exact photographic reproduction. Our guide to selling custom fuse bead art covers pricing, proofs, privacy, packaging, and marketplace rules.
Pre-Build Portrait Checklist
- The subject is recognizable without the source photo beside it.
- The eyes, face outline, and signature markings survive at normal viewing distance.
- The board layout matches the intended physical dimensions and aspect ratio.
- The palette contains only bead colors you own or can obtain.
- Isolated beads have been removed unless they communicate essential detail.
- Every section that should stay connected has a usable bond path.
- Exact color counts include a practical waste allowance.
- Printable pages, board labels, and orientation match the physical setup.
- The fusing, flipping, and flat-cooling area is ready before the project is hot.
- For customer work, the approved proof and permission record are saved.
Make the First Draft Fast, Then Spend Time Where It Shows
The best portrait workflow separates machine work from maker judgment. Let the software handle resizing, real-palette matching, global color optimization, counting, and board pages. Spend your attention on the crop, grid choice, eyes, silhouette, important markings, and physical color test—the decisions a viewer can actually see in the finished piece.
If you are new to custom patterns, start with the complete pattern-maker guide. For more photo conversion detail, use How to Turn a Photo into a Perler Bead Pattern. BeadForge is independent and is not affiliated with or endorsed by Perler, Hama, Artkal, or Nabbi.
Frequently asked questions
Can you turn a photo into a Perler bead portrait?
Yes. Crop the photo around one clear face, convert it to a bead-sized grid, match the grid to real fuse-bead colors, and clean up the eyes, mouth, silhouette, and background before printing. BeadForge handles the grid, brand palette, bead counts, board layout, and printable PDF in your browser.
What size should a Perler bead portrait be?
A tightly cropped, simple face can start around a 58 by 58 bead grid, which is four common 29 by 29 boards. Detailed faces, long fur, multiple subjects, glasses, or a meaningful background often need 87 by 87 beads or more. Compare previews and choose the smallest size that preserves the identity.
How many colors should a fuse bead portrait use?
Start with roughly 10 to 18 colors for a single face or pet, then add a shade only when it restores an important feature. A smaller deliberate palette usually builds faster and reads more clearly than dozens of nearly identical colors scattered across the grid.
What photo works best for a Perler bead portrait?
Use a sharp, well-lit photo with one large subject, visible eyes, a clear face outline, and separation from the background. The original camera file is better than a compressed screenshot. Avoid distant group photos, harsh filters, motion blur, and backgrounds that share the subject’s colors.
Should I use dithering for a bead portrait?
Test both versions. Dithering can create smoother skin, fur, and shadow transitions at normal viewing distance, but it can also add speckle around eyes and edges. Keep it when the whole portrait reads better; turn it down or off when important features become noisy.
Are photos uploaded when I use BeadForge?
Conversion happens locally without uploading your photo. You can create and export a portrait without an account. Choosing cloud save or publishing from an account uploads the relevant project files and previews; keep personal or client portraits private unless you have permission to share them.
Ready to make your own pattern?
BeadForge turns any image into a printable fuse bead pattern with bead counts and pegboard sizing — free, in your browser, no signup.