Fusing guide
Perler Bead Iron Temperature & Settings Guide (By Iron Type)
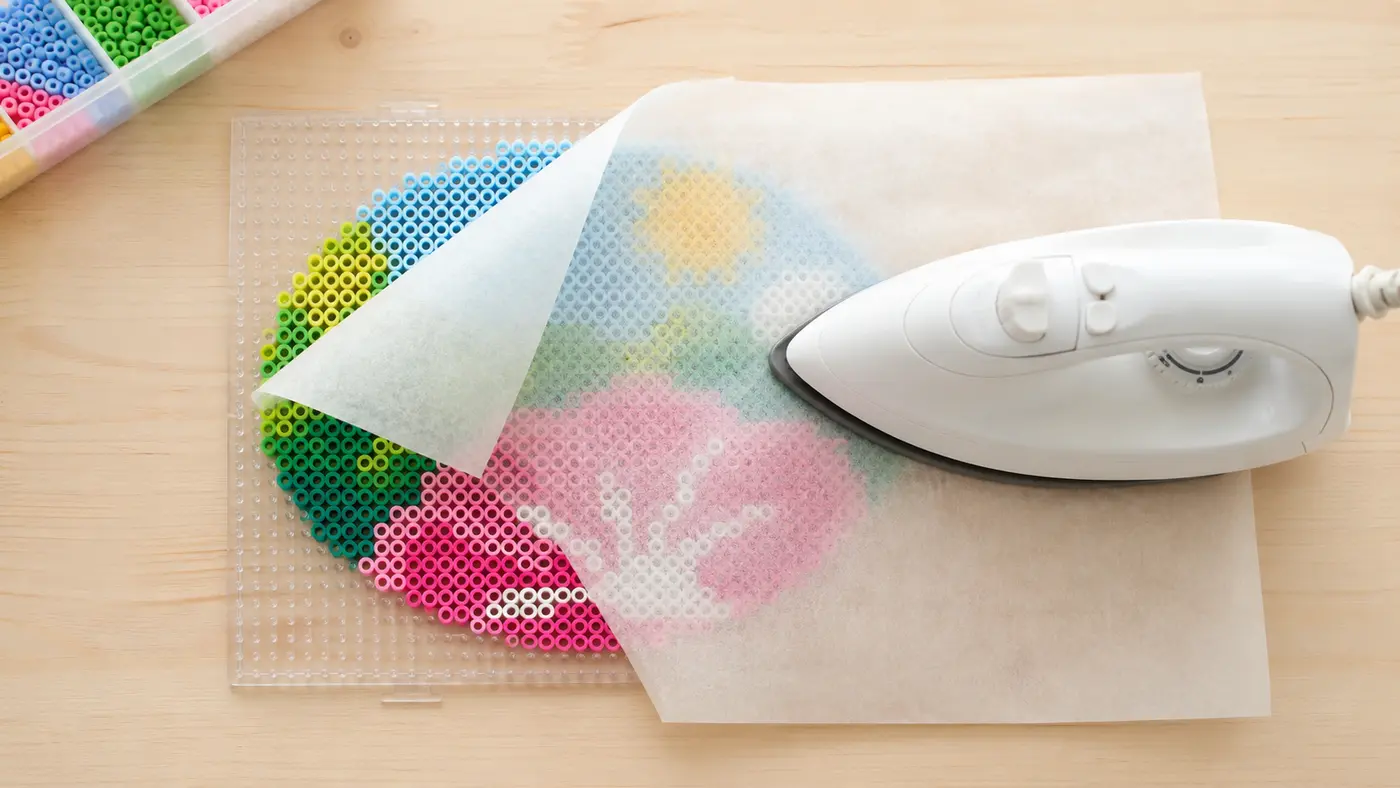
For classic 5 mm Perler beads, use a medium wool-to-cotton setting with steam off. A measured soleplate range of 180–190°C (350–375°F) is a useful starting window, but begin low and test because iron thermostats cycle and dial labels are not standardized.
Keep the iron moving through proper ironing paper and check the bond after 10 seconds. Most small areas need about 10–20 seconds per side; stop when the bead edges join while the individual holes are still visible.
Quick answer
Temperature: medium, wool-to-cotton, about 180–190°C / 350–375°F if measured. Steam: off. Time: check at 10 seconds; usually 10–20 seconds per side. Motion: slow overlapping circles without pressing hard. Stop: when neighboring beads are fused but their center holes remain visible.
What Temperature Should You Iron Perler Beads At?
The best iron temperature for Perler beads is the lowest steady heat that joins the bead edges without flattening them. Perler's current instructions say to start with a medium dry iron, while fabric-style temperature charts generally place wool and cotton in the range makers use for classic 5 mm fuse beads. If your tool has a numeric display or you measure the soleplate, test between 180°C and 190°C (350°F and 375°F).
Treat that range as a calibration target, not permission to hold the iron still. A thermostat switches on and off, and the center, edges, and steam holes of a soleplate can transfer heat differently. Start near 180°C, make a 5×5 sample from the same bead colors, and raise the setting only if repeated moving passes fail to join the edges.
- Classic 5 mm beads: medium or wool-to-cotton; test near 180°C / 350°F first.
- Mini beads: use a lower setting and shorter checks because their smaller mass responds quickly.
- Mixed brands or special finishes: test every combination; pigments and plastics can fuse at different rates.
- Steam: always off. Empty the reservoir when practical so accidental steam cannot pulse through the paper.
Iron Settings by Iron Type
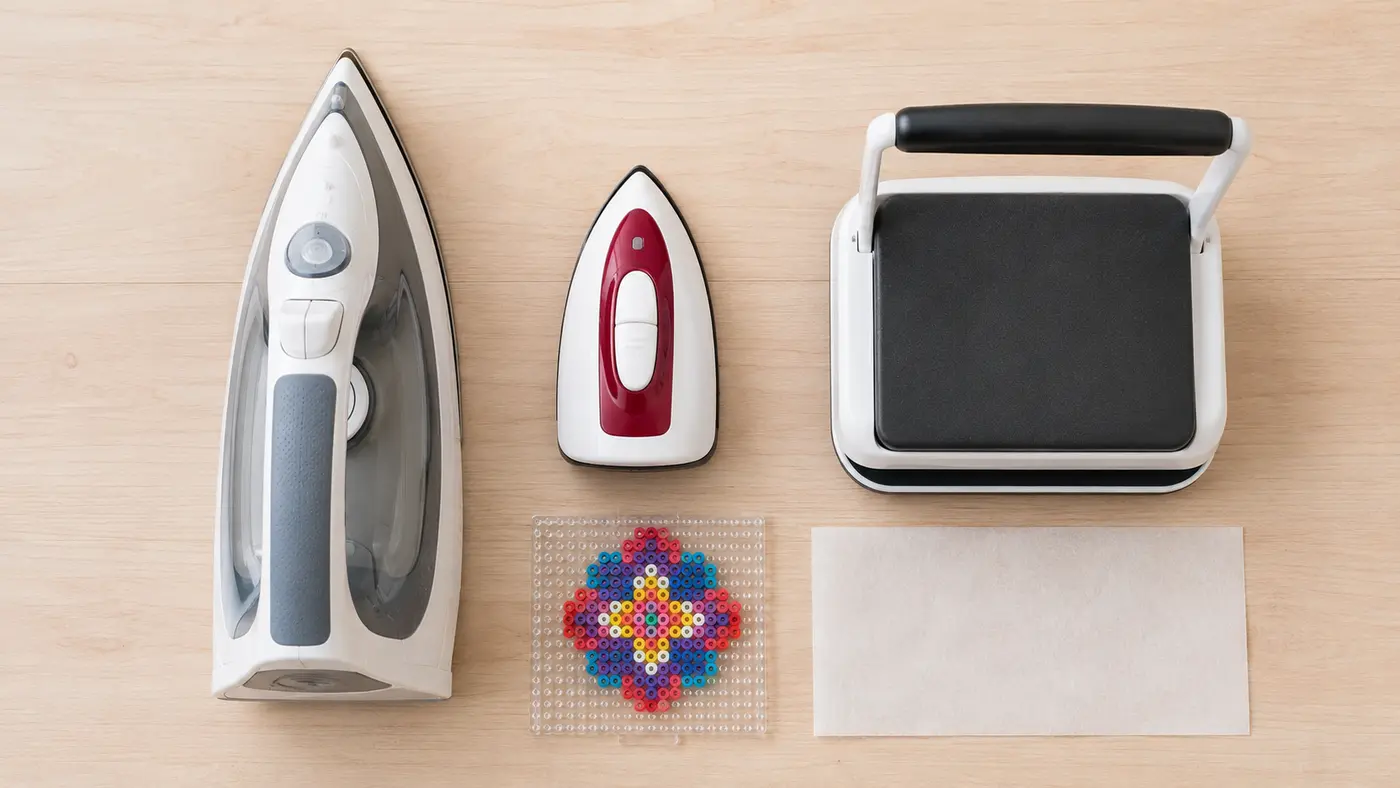
The correct Perler beads iron setting depends as much on heat delivery as the number on the control. A household iron moves heat across a broad soleplate, a mini iron concentrates it in a small area, and a heat press applies heat and pressure to the entire design at once. Use the table as a conservative first test, then record the setting that works with your exact tool.
| Iron type | Starting setting | First check | Best use |
|---|---|---|---|
| Standard household iron | Medium; wool-to-cotton; steam off. About 180°C / 350°F if measured. | 10 seconds | Most small and medium classic-bead projects |
| Mini or craft iron | Medium-low, then adjust one step at a time | 5–8 seconds per small area | Edges, repairs, tiny designs, and controlled detail |
| Compact heat press | Start below the household-iron range and follow the press manual | 5–10 seconds on a test patch | Repeatable batches and large designs removed from pegboards |
Standard household iron
A regular dry iron is the easiest and most forgiving choice. Set the dial to medium, cover the whole design with flat ironing paper, and move in slow circles that overlap the previous pass. Do not press down hard; the iron's weight and continuous motion should supply enough contact.
Avoid relying on the pointed tip for an entire project because it creates narrow hot tracks. Use the broad center of the soleplate, intentionally cover corners and edges, and lift the paper occasionally to inspect the bond.
Mini or craft iron
A mini iron is useful for ornaments, repairs, and stubborn edge beads, but its small plate concentrates heat. Begin at medium-low and check after five to eight seconds of motion. Work in a consistent grid so one patch does not receive several passes while the neighboring patch receives one.
A precision craft iron is not automatically cooler than a household iron. If it lacks a temperature display, calibrate it with scrap beads before touching the finished pattern.
Heat press
A heat press can make production batches more repeatable, but Perler's standard documented method is a moving household iron. A press heats the whole surface under fixed pressure, so copying a household-iron temperature and 20-second duration can overmelt the design quickly.
Remove or tape-transfer the design only with a method suitable for its bead size, sandwich it in clean ironing paper, and start below the normal iron range for five to ten seconds with light pressure. Inspect, cool, and adjust one variable at a time. Never close a heat press on a plastic pegboard.
How Long Should You Iron Perler Beads?
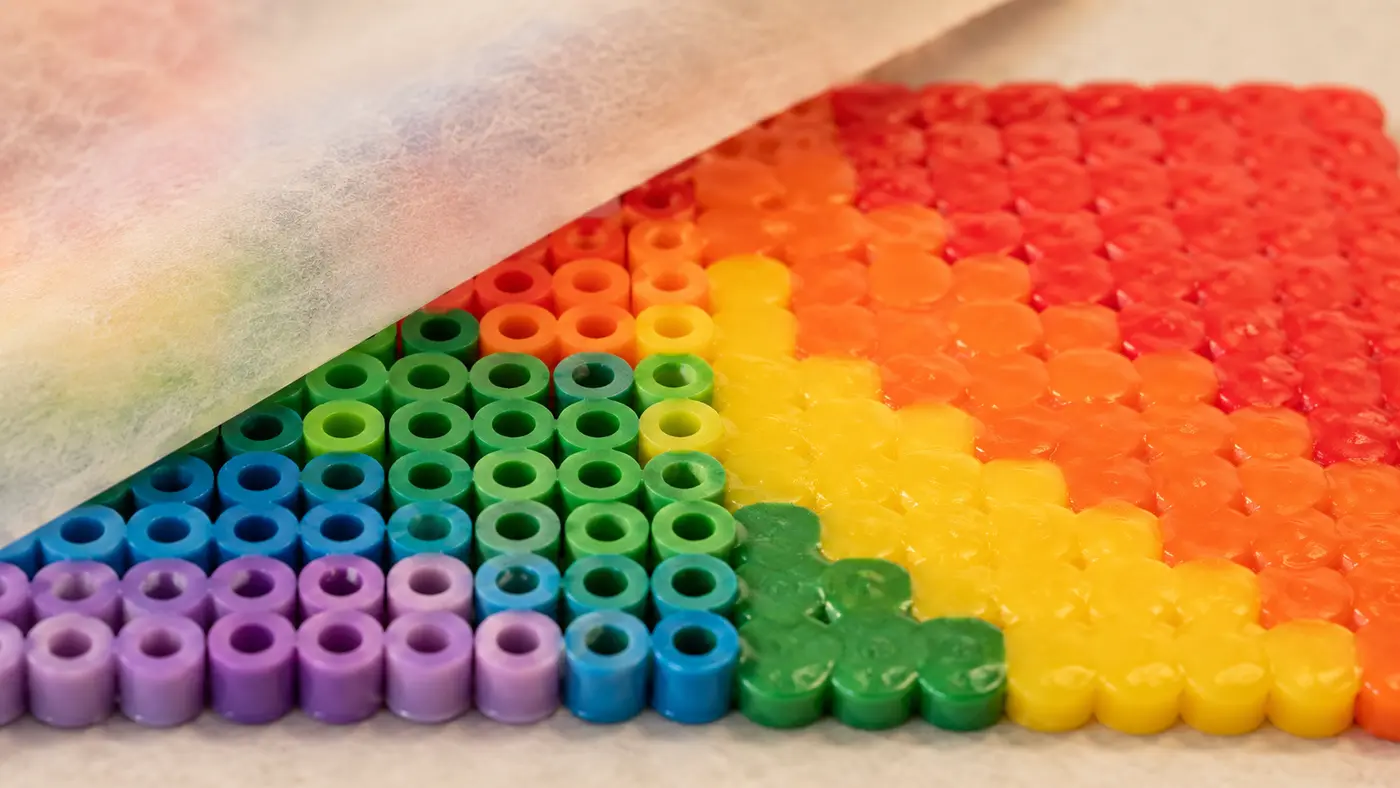
How long you iron Perler beads depends on design size, bead color, tool temperature, soleplate contact, and the finish you want. Perler's standard fusing guidance gives about 10–20 seconds per side, with extra time sometimes needed. Use that as an inspection window rather than a countdown you must finish.
- Front side: move continuously and lift the paper to check after about 10 seconds.
- Continue only where needed: add short three-to-five-second passes over weak areas.
- Flip safely: let the first side become stable, peel slowly, flip on a flat support, cover, and repeat.
- Cooling: place the warm piece between clean sheets under a broad flat weight until fully cool.
The visual cue matters most: stop when the beads are fused into a continuous piece but still show their individual center holes. That standard fuse preserves the crisp pixel texture. A full melt intentionally closes the holes, but it requires more heat and leaves less margin before the artwork spreads, shines, or warps.
Make a repeatable iron calibration card
Dials are not standardized, so write down the result that works instead of rediscovering it on every project. Use the same bead brand, paper, work surface, and iron you plan to use, then record one row per test patch.
| Record | Example | Why it matters |
|---|---|---|
| Bead and size | Perler classic, 5 mm | Mini, midi, and soft series respond differently |
| Iron setting | Between wool and cotton | A dial position is more repeatable than the word “medium” |
| Moving time | 12 seconds, then 4 more | Short additions are safer than one long pass |
| Paper and surface | Perler paper on silicone mat | Barrier thickness and the surface change heat transfer |
| Cooling result | Flat; holes about half open | Judge only after the patch is cool and stable |
Best Irons for Perler Beads
The best iron for Perler beads is predictable, comfortable to move, and easy to keep dry. You do not need an expensive model, and extra steam power does not improve fusing. Choose the tool around your project size and how often you make bead art.
- Basic household dry iron: best all-around choice. Look for a smooth broad soleplate, a clear medium setting, and a steam-off control.
- Adjustable mini craft iron: best for tiny motifs, edge work, and repairs. Choose one with more than a simple on/off switch.
- Compact craft heat press: worth testing for repeated batches after your process is stable. Prioritize precise temperature and timer controls.
Keep a dedicated craft iron if possible. Residue from damaged paper or accidental plastic contact should never transfer to clothing. Whatever you buy, the useful feature is repeatability: mark the successful dial position and keep notes for bead size, brand, paper, time, and melt level.
Common Perler Bead Ironing Mistakes
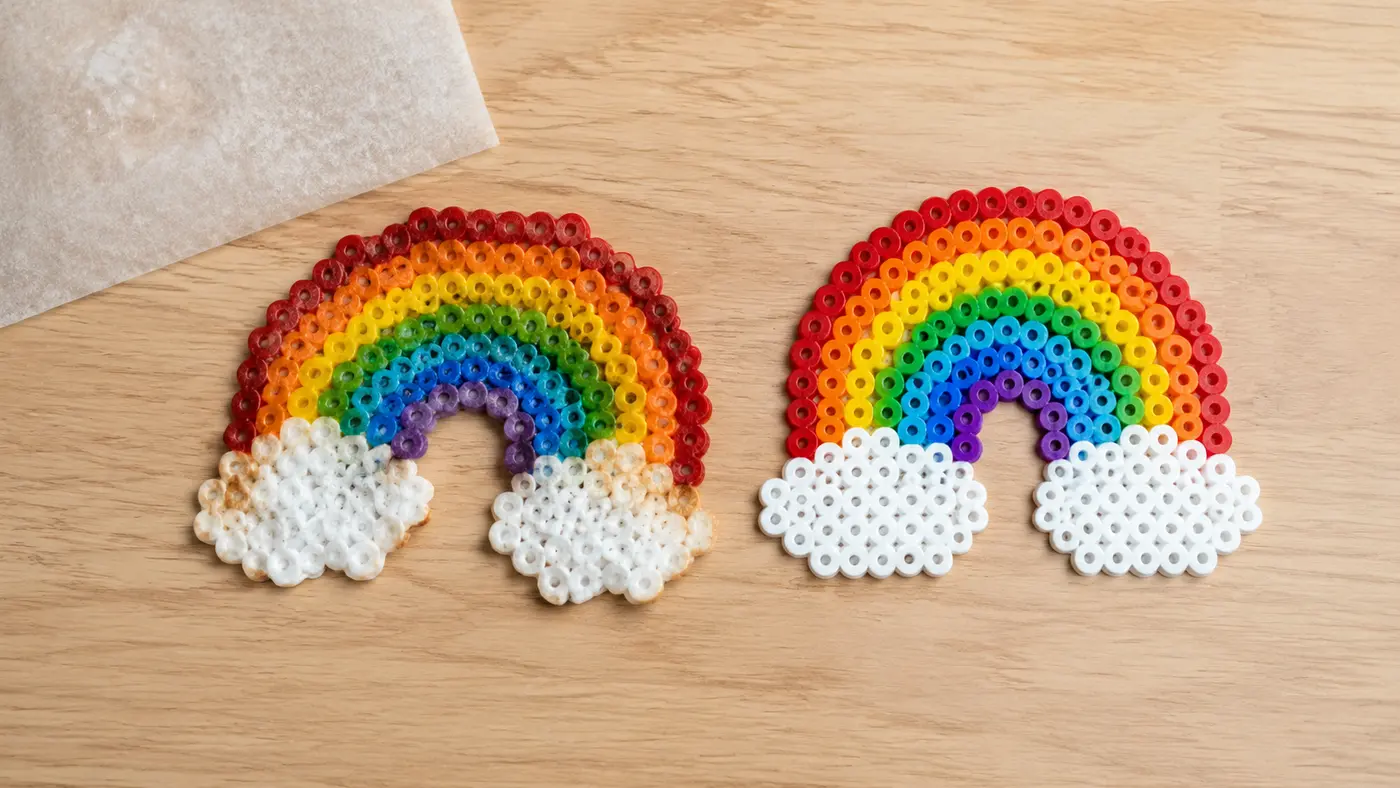
Too hot: scorching, shine, and closed holes
If holes vanish immediately, colors darken, paper sticks, or the pattern spreads outward, stop and lower the heat. Let the piece cool before deciding whether a weak area needs another pass. You can add heat, but you cannot reopen flattened holes.
Too cold: beads fall apart
A low setting can warm the bead tops without joining their edges. Add a few degrees or use another short moving pass rather than pressing harder. Check the outer rows because they often receive less soleplate coverage than the center.
Steam holes create an uneven fuse
Steam vents can leave cooler circles when the iron sits still, while an accidental burst adds moisture and unpredictability. Switch steam off and keep the soleplate moving so every section passes beneath solid hot metal instead of one fixed vent pattern.
No ironing paper damages the project and iron
Never place an iron directly on fuse beads. Use manufacturer ironing paper or tested heat-resistant baking parchment with no wax coating. The barrier prevents softened plastic from sticking to the soleplate and lets you watch the colors become clearer as the tops fuse.
Beads still coming out warped?
Read our full guide on How to Iron Perler Beads Without Warping.
Planning your first project?
Not sure what board size to start with? See Perler Bead Board Sizes.
Choose your image, bead brand, and pegboard layout before you fuse. BeadForge creates the pattern, exact color counts, and printable board-by-board blueprint free in your browser.
Turn any photo into a bead pattern free →Official Fusing Guidance
This guide's baseline follows Perler's current temperature FAQ and standard fusing method: use a medium dry iron, keep it moving, check the design, and expect roughly 10–20 seconds per side. Hama likewise says to keep the iron moving, test a small motif, and match the fabric setting to bead size. An adult should handle all ironing and heat-press work.
Frequently asked questions
What temperature do you iron Perler beads at?
Use a dry household iron on medium, usually the wool-to-cotton area of the dial. If you can measure the soleplate, 180–190°C (350–375°F) is a practical test range for classic 5 mm beads. Irons cycle and vary, so begin near the low end and calibrate on a small sample.
How long do you iron Perler beads?
For classic 5 mm beads, start checking after 10 seconds and expect roughly 10–20 seconds per side with a moving household iron. Stop when neighboring bead edges are joined but the individual center holes remain visible, unless you intentionally want a full melt.
Can you use a regular iron on Perler beads?
Yes. A regular household iron is the standard tool: set it to medium, switch steam off, cover every bead with ironing paper, and keep the soleplate moving in slow overlapping circles. Never touch the beads or plastic pegboard directly with the iron.
What is the best iron setting for Perler beads?
Medium with steam off is the best starting setting for classic Perler beads. On fabric-labeled dials, begin between wool and cotton. A stable dry iron with a smooth soleplate is more useful than a high-powered steam model.
Ready to make your own pattern?
BeadForge turns any image into a printable fuse bead pattern with bead counts and pegboard sizing — free, in your browser, no signup.